The Pikes Peak Barr TrailHome of the Pikes Peak Ascent and MarathonRace Course Descriptionwww.skyrunner.com
Last update: 7/3/2025
Area(s) updated:
IntroductionHaving run up and down Pikes Peak on several occasions, I was asked to write a course description for the 1995 book America’s Ultimate Challenge—The Pikes Peak Marathon. Since then, the course description has become longer and more detailed with a few “side trips” thrown in. Some major updating was done to get it ready for the 2005 update to the above mentioned book.
Index
Google Earth View of the Pikes Peak MarathonThis will give you a literal overview of the course and the major landmarks, including the aid stations.
Google Maps walkthroughFor even more detail, Google Maps has sent someone up the Barr Trail so you can click your way from the bottom to the top and see every zig, zag, root and rock!
While both of these are amazing, read on to get a runner’s perspective of the course to complete the picture...
Before we startWhen it comes right down to it races are about their courses and this course is one of the most challenging in the world. The Barr Trail, on which the races take place, winds up the eastern face of 14,115 foot Pikes Peak—30th on the list of Colorado’s 53 peaks which rise above 14,000 feet (note: some lists place it as 31st out of 54). Starting in Manitou Springs right at 6,300 feet (Colorado Springs Utilities placed a Facilities Information Management Systems marker, FIMS MV08, in front of the city hall near the start line that is listed at 6,300.464 feet if you just have to know) and gaining about 7,750 feet before reaching the finish line or turnaround point at around 14,050 feet, the Pikes Peak Ascent and Marathon will redefine what you call running. In fact, many runners spend a great deal of time walking. It can not be overemphasized that the average Ascent time from 2002 through 2006 has been 4h22m47s for men and 4:50:29 for women. That translates into 19m44s a mile for male runners and 21:48 a mile for females. The Marathon has taken an average of 7:05:09 for men and 7:41:02 for women. This works out to 16:13 a mile pace for men and 17:35 a mile for women. To see the average time and pace for all years go here. [PPA/M results moved to pikespeakmarathon.org in 2015]After running the races many runners find it hard to believe that it could take as long as it does and feel that the course must be longer than stated. The reality is that the course has been lengthened to get it to where it is. When the race started in 1956 the start and finish were located in front of the COG depot. In 1960 the finish was moved .7 miles down Ruxton to its current location. In 1976 the race start was moved from the COG down to its present location in front of City Hall which added 1.1 miles. That was the last course change. However, over the years the written distances of the races have been changed several times even when the course remained the same! Unfortunately for our egos the written distances have been getting shorter, not longer. Even as late as 1982 the entry form had the distances listed as 14.3 miles for the Ascent and 28.2 miles for the marathon. The 1984 entry form stated that the Ascent was “14+” miles long. John Capis, an engineer from New Mexico, and who incidentally trained the women’s Ascent and marathon course record holder Lynn Bjorklund, actually believed that the course was short! He spent two summers measuring and re-measuring the course and put together a detailed log with every conceivable landmark and its position on the course down to the inch. He came up with distances of 13.36 miles for the Ascent and 26.31 miles for the marathon. These numbers were rounded to 13.4 and 26.3 and were used from about 1987 through 1995. In 1996 13.32 and 26.26 miles were used and since then 13.32 and 26.21 miles have been used. Since .01 of a mile is just 52.8 feet I would not worry too much about it and as stated the actual course has not been changed since 1976 when it was lengthened 1.1 miles. At any rate, and within reason, it would not be too hard to take you through the course mile by mile as most course descriptions do. However, this is not practical and even less useful. Although temporary mile markers are put up for race weekend they are best used as mental “check offs” because for the most part each mile is harder than the last one thus making any kind of pace per mile strategy useless. Indeed, the same effort that produces a 9 minute mile at the bottom may give you a 25 minute mile on the top! It is relying on a pace per mile strategy that every year has someone from Flatland, USA sending in an entry form with a predicted time stating something to the effect of “I have run a 1:25 half-marathon and since this course has a hill in it I plan to run around 1:50.” This is 11 minutes faster than the current course record. Even a top Colorado Springs runner was quoted as saying before her first Ascent, “At least I know when I get to the A-frame I will only have about 30 minutes left because it’s only 3 miles.” Her time for the last three miles was closer to 45 minutes. On the other end of the spectrum many repeat runners of the race think that they can make up extra time by going just a little harder at the beginning of the race only to come back later with tales of the death march from Barr Camp to the top. Clearly this is one course where it pays to know what you are getting into! A course description should enable the first-time Pikes Peak runner to set realistic goals and help the veteran peak runner lay out a strategy to improve on their past performances. To do this most runners prefer to break the course down into major landmarks. While it might be worthwhile to list a series of times for major landmarks, it’s more constructive to state each landmark as a percent of the total Ascent time. For example, to say that Hydro Street should be reached in 7:38 opens up more questions than it answers. Who should reach Hydro Street in 7:38? However, stating that Hydro Street should be about 6.3% of your Ascent time works for almost everyone. A person shooting for a 3-hour Ascent should try to hit Hydro Street at about 11 minutes 20 seconds. Please see the pace calculator to compute all of your splits. While you are there, please read the notes to the right of the calculator!!! One final note before we start our virtual run up the mountain. One of the most often used maps of the course is plastered on the back of every Pikes Peak Ascent and Marathon T-shirt. A quick note on that map—it’s much scarier looking than the real thing! This is because it shows a profile of the mountain and does not show the switch-backs that go up its face. The image below represents the average percent grade of the Pikes Peak Ascent and Marathon.
Now, obviously the grade varies as there are some downhills on the way up just as there are some sections which are much steeper. The point is don’t let the T-shirt map scare you! At the same time don’t let this gentle looking incline fool you—over time it will have you begging for mercy!!! With this in mind, we can start our run up and down Pikes Peak...
The start/roadThe preferred line-up position for the more competitive runner is on the left side facing the Peak as this affords the best tangent. For the majority of runners, a place anywhere in the crowd is fine. The “forced" slower start amidst a sea of other bodies may just be the best way to avoid paying an expensive price, in the form of exhaustion, later. After the canon goes off the race starts just like any other, and just like any other the first minutes are the most important. Now is a good time (and the only chance for a long time) to look up at the Peak and ask yourself if you can hold your current effort for the next 2 to 6.5 hours—again, 4h22m is the average male Ascent time, 4:51 the females. The first couple of minutes on the course are mostly flat. Pay attention and pick the best tangents on the wide turning road.When you turn left onto Ruxton Avenue at .42 miles you should be feeling great! You may be surprised just how much you have to hold back to feel this way but remember if you were running a flatland marathon you would not be pressing the first half-mile of the race. For most the only indicator of their effort will be their breathing. Don’t become one of the thousands who have made the mistake of starting out too fast only to end up as participants in the “death march” from Barr Camp to the summit. It’s not too late to put the brakes on and get your pace under control.
First switch-backAfter you pass by the Cog Railway Depot you will go by Hydro Street at about 1.25 miles. This should take 6.3% percent of your Ascent time. Again, it’s surprising just how relaxed you have to be running in order not to be too far ahead of this time. If you were to take the right up Hydro Street you would find the Barr Trail trailhead as well as a very limited amount of parking. Even if you do park here for training run back down Hydro Street so that you can use the same access road to the Barr Trail as the race does. The next ¼ mile represents the only change in the course in recent years. Half of this section was poorly paved after the 1994 race and all of it was paved nicely after the 2004 race. In a way it can help because it offers better traction. However, slipping feet in the loose rocks did serve as a reminder to slow down.
It’s also at these gates that the asphalt ends and a steep section of crude gravel roadway begins. After this another little level section will tease you before yet another steep section. The roadway splits briefly here forming a turn-around and it’s here that you may see some parked cars for your first aid station. If you use the station make it a “grab and go” so people don’t pass you just before the roadway ends and you funnel onto a single track trail. After you pass some fencing on your left you will arrive at the end of your first switch-back. The sharp right turn marks the end of the steep section and if you ran it right the next short section will feel almost flat.
The WsCounting the just finished switch-back as one, there are 13 switch-backs on the front side of Rocky Mountain. This section is known as “the Ws” since the switchbacks resemble the letter W on its side. A curve is a switch-back if you turn more than 90°, so while there are many turns, only count the switch-backs. At the end of odd numbered switch-backs will be right turns and at the end of even numbered switch-backs will be left turns. In general, the Ws make up one of the hardest sections of the course. All too often this is where the outcome of your race will be decided because the seconds you work too hard to gain here could cost you minutes up on top! This is also the section that in the last several years has become severely crowded. To make matters worse this is also where those that went out too fast start to walk which further clogs up the trail. The best way to get through the Ws is to relax and keep on counting. There is plenty of wider trail up ahead before Barr Camp to do your passing. Again, those that do a lot of passing here are the same ones getting passed on the top!About 200 yards into your second switch-back you will come to an intersection. Continue straight where you will now be on the Barr Trail. The right leads down to the parking spaces at the top of Hydro Street. Since you are now out of the trees you may encounter the sun and you will soon find out if you have overdressed! Don’t just cast off your clothes but instead tie them around your waist because you may need them at the top. As you head around a big left curve on the second switch-back there will be a very steep 100 yard or so section before you head briefly back into the trees as you make the turn to finish the second switch-back and pop back into the sun on the third switch-back. You will get a short flat section before you come to the end of the third switch-back where there is a sign reading: PEAK 12 MI, ELEV. 7,200'. If you are pushing here let this sign be a reminder that there is still about 6,850 feet of climbing left. This is a good time to point out that all of the distances and elevations on the metal trail markers are suspect. Use them as reference points only. You could go crazy trying to figure out that from the start to this sign has got to be farther than what simple math would say is 1.32 miles (13.32 - 12). Fact is, it’s just over 2 miles! There is also a big rock here that rolled down to this point many years ago.
There is an aid station at the end of the 12th switch-back. USE IT! At this point the former Mt. Manitou Scenic Incline Railway can be seen if you were to go over to the fence. The 13th switch-back is the longest of the set and when you finish it you will have your first view in the direction of Pikes Peak since the start. However, the summit itself is still hidden. One more note on this section is that if you glance back down towards Manitou Springs you may be surprised at just how fast you are gaining altitude. The best is yet to come... While this is by no means the end to the switch-backs, it’s such a prominent change in direction that it serves as a landmark, “the Top of the Ws,” which is a fifth of the way into the Ascent. This point should be reached in 20.1% of your scheduled Ascent time. If you are on schedule and feeling good, chances are you are going to have a great race. If you find yourself much ahead of schedule it’s probably too late but at least you will be able to predict the disaster to come.
The Rock Arch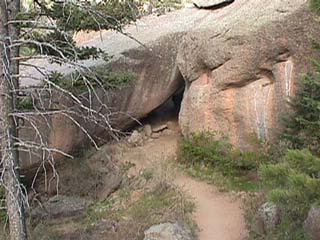 After reaching the top of the Ws you will notice that many of the switchbacks are slightly steeper.
After several of these you will come to a section that has tricked even the seasoned peak runner
into believing that they are approaching No Name Creek and the next aid station.
No such luck and for that matter even the little stream is often dry by August.
About 75 yards later a quick double switch-back serves as a marker that you are near the end of your first climb.
The next right turn will give you a view of Pikes Peak. If you are smart you will not
look because it will appear so far away. However, if you do look repeat after me,
“This serves as yet another reminder to slow down.” From this point you will
have a mostly flat—there are even a few gentle downhills—traverse over
to a natural rock arch. Before you get to the arch however you will learn the law of
the trail which simply states: “For every flat or downhill section there is a
steep section right after it.” The little climb up to the arch is a steep one!
No Name CreekAfter going through the rock arch there is another double switch-back and then a short but steep section followed by two more switch-backs. After stepping up three large steps (two fence posts and a tree section) you may see a cement arch on your right which is one of many all over the mountain. They are tunnels for the Colorado Springs water system. Many a person has ducked into this one to get out of the rain before it was closed off in 2004. Shortly thereafter you will come to the Manitou Incline turn-off. Partially hidden in the bushes on the right is a sign that reads: COG RR DEPOT 3, BARR TRAIL. Continue straight! If you were to take the right you would see another sign that reads: PIKES PEAK SUMMIT 10, BARR CAMP 4, TOP OF INCLINE ¼. A short and steep downhill with an even shorter flat section reaffirms the law of the trail as you climb very steeply up to No Name Creek and your third Aid Station. This station is coordinated by the enthusiastic members of the Pikes Peak Marathon Society of Arkansas who always tell you how great you look. You should be looking great because you are not even a third of the way to the top. The station should be reached in 29.3% of your Ascent time.
(Note: Some refer to No Name Creek as “French Creek” most likely because that’s what it’s called on the map on the back of old PPA/M maps and t-shirts. However, the south fork of French Creek is over a mile away and would have to run uphill to get to the Barr Trail at this point. So now we call the creek “No Name Creek.” No Name Creek originates in the area to the west of the Experimental Forest and drains down to Ruxton Creek by the Cog which then runs into Fountain Creek in Manitou.) (Note on the Note: While staying at Barr Camp I ran across a book about the Experimental Forest. Or was it a book about Fred Barr? At any rate, in it there was a map of the area and it turns out that “No Name Creek” actually has a name! It’s called “Rock Creek”!!!)
7.8 to summit signThe next 100 yard section of trail is fairly wide because Colorado Springs Utilities uses this section to access the various water pipes that can be found by taking a left at a small junction in the trail. So much traffic in fact that many first timers on the Barr Trail get tricked into taking the left turn following the road instead of small trail. The Barr Trail continues straight and is rather narrow at this point—especially compared to the trail you have been running on. This is also the area where you may notice a rather sudden drop in the temperature. There are only six more switch-backs (counting the one you are on as one) before you begin the long traverse over to Barr Camp. The fourth and sixth switch-backs offer one last view (until up around the A-frame) back down to the cities below! The traverse begins with a little winding up the trail past a big rock. Soon after that you will come to the first of several level sections that proceed through a section of trees that reminds some of the Hansel and Gretel forest.
After two distinct flat sections in the space of about a half mile you will come to Bobs Road where there has often been a search and rescue vehicle parked. Getting to this point you will pass by two trees in the middle of the trail which I prefer to pass on the left. Staring in 2002, Bob’s Road also became the site of an aid station after several years of trying to get one established went unanswered. This station can drastically reduce your amount of time without water as it’s almost halfway (time wise) in between No Name Creek and Barr Camp. As an example, for someone running a 4:30 Ascent (about the average) it takes about 55 minutes to run from No Name to Barr Camp. The Bob’s Road station would split that into about 25 minutes and 30 minutes. After going through the aid station the next .15 mile section contains two gentle downhills separated by a very short level section. How you feel on these is a good indicator of how your pacing has been up till now—if these feel great then you have done great. If you are feeling tired even on the downhills you are probably in for a long day! This section of trail is rather wide and great for passing. At the bottom of the 2nd and longer downhill there is an almost indistinguishable trail to the left which leads down to the same service road that you passed on your left just after No Name Creek. At this point you get your first real climb in a while and it even has a pretty steep section in it. However, it’s short and soon you are on another level section that will lead you to a sign that is fairly close to halfway between No Name Creek and Barr Camp. The sign reads: PIKES PEAK SUMMIT 7.8, TOP OF INCLINE 2.5 and should be reached in 39.7% of your Ascent time.
Barr Camp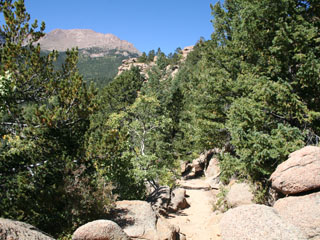 Soon after leaving the 7.8 to summit sign you get another downhill that ends at a rock that has some roots
from a nearby tree going under it. After a short flat section you will take your first real turn in a while
when you take a left. You will be traversing around a ridge and when you reach the top of the traverse you will
be treated to another flat section and your 4th gentle downhill. Another short level section and then yet
another gentle downhill section follows. A short gentle up followed by a short flat section will lead to another
left/right traverse that this time climbs up to Lightning Point—an excellent vantage point if you find yourself with a
little extra energy to climb up the small rock outcropping. I have spent quite a bit of time sitting on these
rocks admiring the view of the cities below but so far not during the race. The right turn at Lightning Point
also marks the start of your last downhill.
This one is steeper than the others and is also quite rocky—be careful. You will now be running next
to a little creek that as far as I know does not have a name so let’s call it Lightning Creek and see if we can
get something started.
Bottomless Pit sign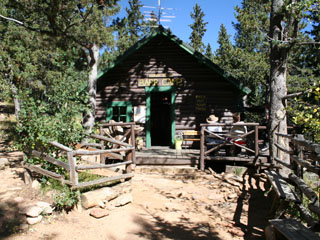 It’s tempting to go for the feed bag at Barr Camp but try to resist a picnic
as you do not want to lose your momentum. If you do stop here and you find you
are not in too big of a hurry you can sign in at the green box that reads:
PLEASE REGISTER.
After you leave the cheering volunteers it’s back to the solitude and the beginning of what many runners describe
as mentally the hardest part of the course. What most likely
makes this section so hard is that this it the last section before most runners become
walkers—a tough mental decision indeed. Those that are feeling really
bad can take a right immediately after Barr Camp and run a relatively flat 6 miles out Elk
Park Trail and perhaps even visit the Oil Creek
Tunnel on the way. They will arrive at mile 14 of the toll-road where they can flag
a ride back down into some air. The law of the trail applies here too however,
as the last 2 miles are nothing but up.
Three sets of right then left dog-leg turns will have you briefly running next to Cabin Creek which originates just above the A-Frame. The frequency of rock step-ups is now to the point that there’s no point mentioning them all—get used to it. A quick right turn will take you away from the creek and take you through a series of zig-zags which will bring you to another footbridge made up of half sections of tree trunk. This footbridge is almost exactly ½ way between Barr Camp and the Bottomless Pit sign.
At 58.2% of your ascent time you should reach your next trail marker—the Bottomless
Pit sign: PIKES PEAK SUMMIT 4.8, BOTTOMLESS PIT 2.4
Do NOT go straight here but instead turn left before the big rock in front of the sign—although the
view from the pit is a nice one, the diversion would add significantly to
your time especially if you get lost after the trail peters out. Getting to
this trail marker also means that you have covered roughly 1/3 of the distance from
Barr Camp to the A-frame.
On to the A-FrameYou are now on one of the longer switch-backs of the course. It alone will be the 2nd third of your trip from Barr Camp to the A-frame. It helps to know that there are 15 switch-backs from the bottomless pit sign until the A-Frame so when you get to the end of this one—it does end—count the right turn as 1.
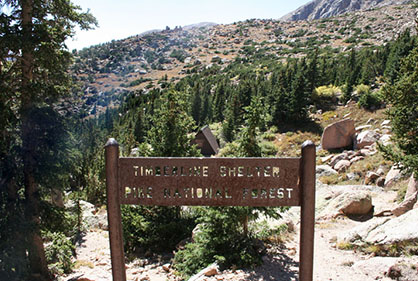
You will also start to see the remains of the Dismal Forest caused by a fire that burned a lot of the Front Range around 1910. At the end of switchback number 11 is your next aid station which gets its water from Cabin Creek. Don’t worry, it’s filtered! Also, if you look carefully, you can see the roof of the A-Frame from this location if you look slightly up and to your right before you make the sometimes wet turn. At the end of switch-back number 15 you will come to another trail marker that reads: TIMBERLINE SHELTER, PIKE NATIONAL FOREST. From here the A-Frame will be down to your left. If all is going well, you have reached 71.2% of your goal time. If things are not going well you can either sit down on the big log to the left or go take a nap in the A-frame. Do keep in mind the 4 hour and 30 minute cut-off time however or you could find yourself heading back down the mountain without a number.
3 to go A right turn and one very short switch-back after the A-Frame you will go by another trail marker that reads:
BARR TRAIL ELEV 11,500', PIKES PEAK SUMMIT 3.
I do not do any timing from this point because the A-frame is so close and is a much better landmark to
focus on. As an aside, I am positive that this marker is
off the mark. While the distance seems about right, I think the altitude reads
about 510 feet too low—you have done more climbing than this marker would give you credit for. My
altimeter usually reads around 11,950' but is easily affected by the weather. My GPS puts this point at 12,010
feet. Logic seems to validate these readings as well. Based on the posted elevation the next mile alone would have to gain 1,200' compared to the
1,200' climb from Barr Camp in about three miles. This, as you will see, is just
not so. Again, while it’s no surprise that the trail markers might be off because they were put up so long ago, most
people still describe the course based on these landmarks because even
if the trail markers are wrong they are not moving.
A quick switch-back to the right and the dead forest will be very prominent and almost scary in appearance. Do not miss this right switch-back as it’s hard to see and not very obvious. If you do miss it you will be doing a very steep climb straight to the Cirque. I missed this turn in my first Pikes Peak Ascent in 1987 and after about 50 feet I found myself almost crying at how steep the “trail” had become. Then, much to my relief, the next runner called me back onto the correct trail. Back in the “old days” people cut all kinds of switch-backs—sometimes because they did not know which way to go and sometimes on purpose. In the 1976 race a runner cut some switch-backs as a “protest move” because he says other runners had cut the course on him in year’s past. He already had a substantial lead so the race outcome probably wasn’t impacted but the shortcuts gave him a “course record” that stood for 16 years. Unlike in the “old days,” now you will be disqualified for going off the main trail anywhere on the course. In fact, several people have been DQed for this very thing over the years.
Tree line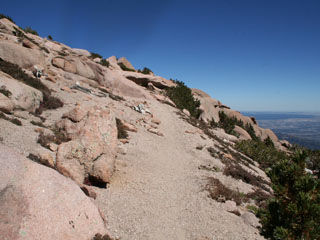 At the end of this switch-back you will take a left—a left that will
change the rules. Almost thirty percent of your time is going to be spent
covering the final 3 miles if you stay on schedule. However, ask any Peak
runner what happens above 12,000' and they will tell you that schedules
don’t mean a thing. Indeed, this mile alone has crushed the dreams of many
runners. From here on up it’s about wanting to get to the top. Think to yourself —JAM! Just Always Move!
If that means running—awesome. If that means walking—super. If that means crawling—do it.
About one hundred yards after the left turn you will be above tree line. This simply
means that trees do not grow above this point. For runners it means there
is little air in which to breathe. It also means things could start to get
very cold and very windy. If you have a long-sleeve shirt or jacket wrapped around
your waist now is the time to put it on. Even if you feel warm, your body is working overtime to retain heat.
In memoryYour first right turn above tree line will take you past the last of any significant vegetation. A quick double switch-back will have you on a relatively level section that will pass by a large pile of rocks. It was started around 1950 by the AdAmAn club in honor of Fred Barr.Soon after that, you will run past a memorial to Inestine B. Roberts who died in early August 1957, after her 14th ascent of Pikes Peak at the age of 87 (sic). Read Inestine’s story
2 to go You will now take many switch-backs with most of the
ones to the right being longer than the ones to the left. This will put you on
the far right side of the East face of Pikes Peak. There is no rhyme or reason
to the switch-backs and counting them is next to impossible because they vary so
much in size and direction and there is just not enough air for the brain to do higher math.
If however, you are the counting type and you can still count and keep track
there are 23 switchbacks from the A-Frame or, if you prefer, 17 from the Roberts
memorial. Some of them have very loose gravel, some have rock step-ups. At any rate, in what might seem
to take forever you will reach the next trail marker:
BARR TRAIL ELEV 12,700', PIKES PEAK SUMMIT 2.
A controlled early effort
has brought you to 81.2% of your goal. This was a hard mile but if you have
not wasted all of your energy the next mile is somewhat easier because it only
gains 600 feet. There used to be an aid station at this sign, or just before it, depending on the availability of a
helicopter from Ft. Carson. However, it has not been here in many years.
1 to goThe sign reads: PEAK 1 MI, ELEV 13,300. When you look up you will immediately feel that this looks to be a very long mile. In this photo you can even see part of the new Pikes Peak summit visitor center which opened on June 24, 2021. Personally, I try to avoid looking toward the summit at all during the last three miles—it ALWAYS looks farther away than I feel I can run. I prefer to take the final 3 miles one switch-back at a time. If your schedule matters anymore you are now at 89.7% of your goal. If you have anything left resist the urge to start pushing really hard just yet. There still is about 750 feet of climbing to go. Don’t let the fact that you are not quite running to the top fool you. Although this means you must also have less than a mile to go you need to keep things under control. The hard part is yet to come.
CirqueThree switch-backs more and you will pass the Cirque sign: CIRQUE 1,500 FEET DEEP. This photo of the sign being protected by a marmot was taken by my daughter, Kyla!If things are
really going bad you can end it all with a sharp left turn... Otherwise, six more short switch-backs will put you on a traverse
to the right under the summit. There are several rocky sections here
with one particularly nasty step-up rock—you must step on the edge
of a sharp rock to get onto a slick angled rock. Again, unless you have
been on them you may find yourself losing ground as you stumble from one to the next. A somewhat level section will bring you to the end of the traverse
where a sharp left switch-back will take you back toward and under your last major obstacle. In the middle of this switch-back there is another mean step-up
and then a fast level section. When you hang the right at the end of the switch-back you will get some more step-ups before you get another short level section that will lead you to
your next trail marker.
16 Golden Stairs Perhaps the most dreaded sign on the trail reads:
16 GOLDEN STAIRS. Do not bother to start counting the
small number of rock step-ups because the sign is referring to the 16 switch-back pairs to the top
of the Barr Trail. Of the remaining 32 switch-backs you will be doing 28½ of them.
Even if you are not pressing the effort that it takes to get through the
first 11 will put you into oxygen debt if you are not there already. Be careful, try to stay smooth and
avoid large energy zapping movements over the step-ups. After you get through the first 7 switch-backs
there will be a 1 switch-back relief before another 3 try to finish you off. However,
after the 11th switch-back—watch your head, a rock is sticking out just waiting to get you —
you will go through a series of 4 easy switch-backs that will put you
on a flat section that even leads to a little downhill! If you have it in you, now is the time
to push because there are only 13 more switch-backs, not counting this one, to the finish line. Build your
momentum on the level part and let it carry you down the little incline and over a section that is often very wet to get you
started up the next switch-back. If you have been walking and intend on doing the
round-trip try to run the flat and downhill section because this will help prepare
your legs for the turnaround at the top.
View of the area just covered: 1 to go, Cirque and 16 golden stairs
Fred Barr SignFive very short switch-backs after the curve at the end of the flat section the course passes by a sign:
You may miss it as you would have to be looking up to see it. Here are photos looking up and down to the Fred Barr sign:


The top (well almost)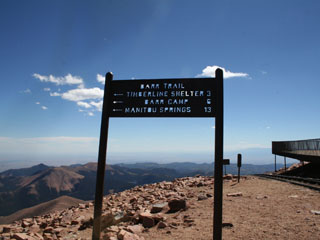 The Fred Barr sign means that there are only 8 more switch-backs to go. Three
short and shallow switch-backs will put you on the right traverse that will
take you up and almost level with the finish or turnaround point. The turn to
the left at the end of this switch-back will get you to the finish after
a zig-zag—count them as switch-backs—and 2 very small switch-backs. Now is NOT the time to sprint in
either race! There is no sense going into oxygen debt and then having to either stop and try to recover
where the partial pressure of oxygen is 27% less or try to run back down
over the course while you are dizzy.
If this is your finish, savor the moment and enjoy it while
you do the last four switch-backs, or the final two 16 golden stairs, to reach the top of the Barr Trail!
If this is your turnaround grab some food and water and get out of there! Keep a steady pace and try to descend
as quickly as you can. There is more food, water and most importantly, air down below.
Back downMany runners view the turnaround and the run back down as the start of a different race. While this may be positive from a mental point of view, it’s important to remember that you are not starting this “new race” with a fresh body, or mind. It’s also important to remember that there is still a half marathon to go—downhill or not—and pacing is crucial. Many a runner has seen Barr Camp with little effort only to walk much of the final miles.
To the 16 Golden StairsThe first few switch-backs may be rough going because they are fairly rocky and you may still be feeling the effects of your ascent. However, you should start to feel better with each passing step and it’s not uncommon to see runners sprinting through these switch-backs jumping off of rocks with arms flailing. Don’t! It’s a precious waste of energy, better saved for down below. Keep controlled and give your mind and body a chance to adjust to going downhill. Time passes quickly up here and many runners don’t realize that they are running through the 16 golden stairs until they almost run into the sign at the end of them.
To the A-FrameAfter leaving the 16-golden stairs the switch-backs become longer and less rocky. This is a good time to start opening up your stride and getting used to the loose gravel that will be with you until the A-frame. It’s very easy to have your feet slide out from under you on any of the switch-backs. Be careful of the short rocky sections both before and after the Cirque. At high speeds misjudging your step can be a painful experience. Complicating the matter is the fact that uphill and downhill traffic must use the same trail. If you are running uphill you should yield to the downhill runner. If you are going down, try to remember how you felt on your way up and anticipate runners not being able to respond fast enough to get out of your way.If you did not drink and eat at the top now is a good time to use the aid station provided. It can get very hot as you descend, and dehydration is your worst enemy. As you make you way to the A-frame the loose gravel gets deeper. It is common for little rocks to get in your shoes. If this happens, the time you spend taking them out will probably be less than the time you might lose if you leave them in. Again, use the aid station at the A-frame because from here on out the temperature will most likely be rising.
To Barr CampMany runners have their worst falls between the A-frame and Barr Camp. Because of the shade amidst trees, the lighting can be tricky. There is also an abundance of tree roots and little rocks that seem to reach up and grab unsuspecting runners. On the way up these switch-back got shorter, so be prepared for them to get longer on the way down. Again, counting down from 15 starting at the A-Frame will get you to the Bottomless Pit sign. There are several large rocks and boulders to negotiate in this section so try to look ahead. On the way up it was important to stay smooth so as not to waste energy. On the way down this is just as important if not more so. If you jump inefficiently off of rocks you are subjecting your legs to unnecessary stress when landing. This pounding accumulates and can adversely affect you—if not during the race, the following day. Try to imagine yourself as a hurdler with your body not going up and down but instead lifting your legs over the obstacle. As you get closer to Barr Camp the trail becomes wider and it’s easier to run faster. Pay attention! Those little rocks and roots have not gone away. As always, do not think that by passing up the aid station at Barr Camp you will be saving yourself any time.
To No Name CreekGetting to No Name Creek can be surprisingly difficult because it’s during this time you must go back up the downhills that you were so thankful for on the way up. These “little” hills were referred to as “gentle” on the way up and to many they almost seemed insignificant. It’s funny how time and distance can change one’s perspective. If you are not feeling strong on the hills, don’t worry. They are short. But any sign of weakness is a good indicator to take in some food and water when you reach the Bobs Road aid station. If you are feeling good try to resist powering through the hills, because you are still at 9000' and they can easily turn several hours of smart running into a disaster.As you come back to the switch-back portion of the trail you will get your first glance of the city below. Although it seems far off try to keep a positive outlook—it’s less than 4 miles of running. The last several switch-backs approaching the No Name Creek aid station are fairly steep—avoid using your quads to slow down. Instead, take shorter and faster steps. Think of it as if you were changing gears to downshift in a car. Again, remember to use the Aid Station!
To the WsAfter going up the last significant uphill that leads past the Manitou Incline trail, many runners get their first feelings that they are truly going to survive and finish the race. However, those that have not planned properly will find the same wall as in a regular marathon patiently waiting for them. After passing though the rock arch there is a level section, followed by a small rise. That rise should serve as a reminder that you will be approaching a short double switch-back. If you are going too fast you may find yourself missing the second one and flying down an embankment. Some runners use the fence posts to swing around the switch-backs. Other runners prefer coming into the curves wide, cutting them close, and exiting wide. Again, liken your technique to driving a car around a curve. Whatever you decide, it’s important to keep your momentum.
To the roadAs you turn left back onto the front of Rocky Mountain start your backwards countdown! You have only 13 more switch-backs, and for the most part each one is shorter than the last. Pay attention as always because the rocks and roots are still seeking victims. Don’t get confused by the intersection on your 12th switch-back. Ignore the sign and head back down the same way you came up. That sharp left switch-back would take you to the Barr Trail trailhead on a flatter, albeit slightly longer trail. Instead, you will continue straight to get to your final left switch-back along the creek. The final couple of steep sections heading back down to the road can be rough, but at least they are on dirt and gravel.
To the finish It’s kind of nice that the road starts on a somewhat level section because
the pavement will feel pretty hard after all the time you spent on the trail. Enjoy it
while it lasts, however, because the super steep section down to Hydro Street can be
a quad buster! And if you have accumulated some blisters, it can add insult to injury.
But don't worry because you are almost done and it’s mostly gentle downhill from
Hydro Street to the finish. As you make your way down Ruxton Avenue you will start to see
more and more spectators. People will be cheering you on from the sidewalks
and may even reach out for a “high five.” While you may have been
hearing the announcer for the past few miles, now you can see him and he’s
calling your name! And, unlike in the past where the finish was just around the corner
in front of the old car wash, now the race finishes just before the intersection with Manitou
Avenue. Congratulations, you’ve done it!!! Now, if you can, try to do a little cool down.
It will make the celebrations yet to come that much better!
|
|||||||


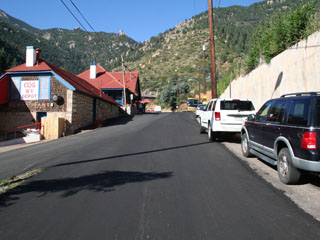 After passing Miramont Castle on Ruxton Avenue the course takes a noticeable turn in the
direction of up. To run the same effort you must, by definition, slow down.
Soon you will come to a fork in the road which is right at the 1
mile point of the race. You will take the right fork which will briefly put you
on Winter Street before connecting back into Ruxton Avenue just before the Cog
Railway Depot. This is a short but steep section before leveling out for an even
shorter section in front of the Depot. If you are feeling bad at this point, there
may still be some spots left on the train. For everyone else the fun is about to begin!
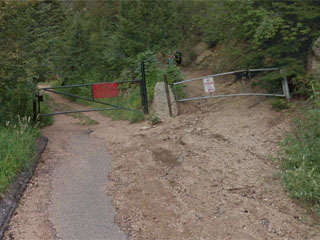 If you have been working for position, now is the time to stop and establish a rhythm.
The hill that starts at Hydro Street is the steepest on the course and it’s silly to take
the chance of blowing your race on such a short section. Indeed, this one section has probably
been the cause of more poor performances than any other on the course.
If people pass you here ignore them because
you’ll most certainly see these runners further up the trail when they pay for their indiscretion.
At the top of the hill there is a short level section that will bring you
to two gates. The gate on the right (open on race
day) is the way to the top. The gate to the left leads to a small bridge
that has a sign on it that reads:
 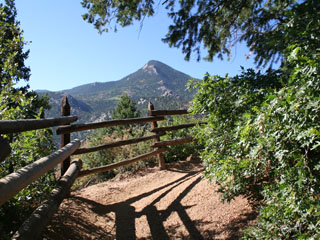 Soon after the sign and the rock you will be heading back into tree cover. The remaining
Ws all have a relatively constant grade to them. Try to get into a rhythm—a rhythm
that you can keep up that is. This is a beautiful section as you
make you way up the next 10 switch-backs. This section is often humid at this point in the morning as the sun
starts evaporating the dew. There are a few bonus switch-backs (7, 8 and 11) which are very
short and there is a small flat section (20 yards or so) on both 8 and 9. Don’t underestimate the importance
of these little flat sections throughout the course! If you are running a smart race they will almost feel
out of place after all the climbing you have been doing and you will feel yourself running faster. If, on
the other hand, you have been going too hard you will probably not even notice them and if you do they will
still feel hard thus serving as yet another reminder to slow down!
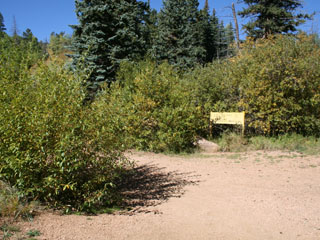 In the intersection there is a sign, that if not hidden by the volunteers reads:
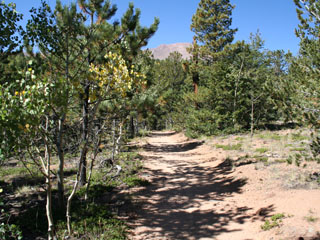 If all is going well you can really do some running here and pass by the poor souls, and their soles, who tried to conquer
the Ws. However, no matter how you feel the next 2 miles are important from a strategy perspective. Whereas most of the
race your pace may be forced on you by either the crowds at the bottom or the lack of air on the top
this section is one of the few where you get to decide what you will do. Further, if things are not going well this is the
only section where you can stage a decent recovery without stopping! Many times I have come to this
point feeling lousy but have managed to recover before getting back to the serious climbing at Barr Camp.
I have also come to this point many times after a well-paced effort and was able to “put the race away” on this
section of trail. There is a great satisfaction in pulling away from people here that you know have pushed too hard too soon:-)
Just remember that even this two mile section still has an average grade of 5.5% so don’t get too carried away.
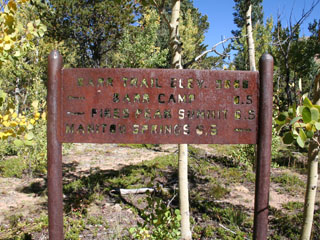 Around ¾ of the way to Barr Camp from No Name Creek you will cross a little footbridge.
Unfortunately this footbridge marks the end of the more level stuff that we have been enjoying for the last 2 miles
but it does serve as a reminder
that you are getting closer to Barr Camp. Another left/right traverse and you will be on a winding rocky section
that has several rock step-ups spread out over it that can really put a sting in your legs. Just know that these step-ups means you have all but arrived
at one of the more welcome signs along the Barr Trail—the ½ mile to Barr Camp sign. Some swear this is the
longest half-mile in the world. However, it’s not too far off—it’s only 242' long—and when taken into perspective
with the average pace of the race just serves as a harsh reality check. The sign reads:
 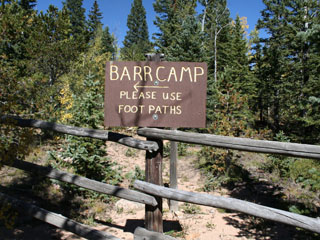 From the half-mile sign you can see up a long switch-back that ends in a short double switch-back after
another one of those evil rock step-ups. Now I am not sure what Fred Barr was thinking here but this is one of the few
sets of switch-backs that seem totally counter productive. However, after you go through them there are no more
switch-backs to Barr Camp. Instead, you will take a gradual left turn and then a sharp right which will put you in a section that
often resembles a swamp. This is followed by a quick left over a small rock drainage, another rock step-up and then a sharp
right turn. You are now on a nice straight-a-way that is a little more level and quite a bit wider. If you are looking you
may notice a small sign on a tree on your left that says
 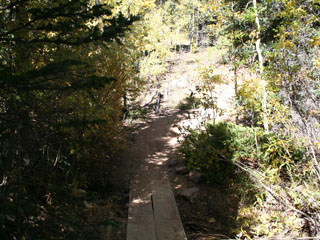 For the rest of the runners there is nowhere else to go but up. Within a few hundred yards
of Barr Camp you can see a helicopter landing pad on the left. Rides are expensive so
don’t even think about it. Besides,
considering the relatively small number of helicopters that have landed here you would
do well to remember that one of them crashed into the trees on take-off. Although no
one was seriously hurt large parts of the blade landed only a few feet off the path
from Barr Camp to the Outhouse. Your odds are better if you just keep running!
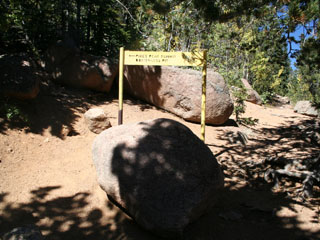 A few feet later comes a more modern footbridge.
A right and two more switch-backs will put you on the long straight-a-way to the Bottomless Pit.
Throughout this section you will get your first real taste of negotiating large step-size
rocks that are even more pesky than the rock step-ups. Concentrate on your foot placement
so you do not have to change your stride length. Again, momentum is
everything. Jumping onto or over rocks is a waste of energy—stay smooth and controlled.
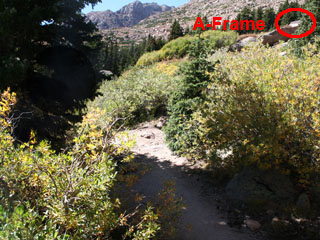 The remaining 14 switch-backs make up the last 3rd of your trip from Barr Camp to the A-frame. Switch-backs
2 through 5 are medium in length and at this rate you will feel like you will never make
it to the A-frame. However, the next 2 are very short bringing your count to 7. Number 8 is medium in length and has
some big rocks that require negotiation. Number 9 is longer still but after it you will be rewarded
with 6 quick switch-backs, some of which are less
than 50 meters long.
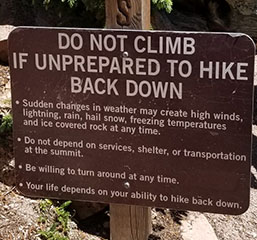


 A couple of switch-backs after leaving the two mile sign
you will be on a long traverse over to the Cirque. While there are still a couple of
smaller switch-backs—both with rock step-ups with one being a killer—
for the most part it’s a straight shot to the teeth-like
notches in the distant horizon. As you approach
the Cirque another aid station will greet you. This one gets its water from
a hose running from the summit. The suction this causes is so great that
they can’t hook the hose up directly but instead they have to siphon the water.
Shortly after this a bad patch of rocks will slow you down unless you have
trained on them in advance and know where to put your feet. The course then
does makes switch-backs along the edge of the Cirque before you come upon
your next sign.


